
Click here for a SIMPLE tutorial using Adobe Photoshop.
The program that we will use to prepare your image for uploading is called GIMP. According to gimp.org, GIMP (the GNU Image Manipulation Program) "is a freely distributed piece of software for such tasks as photo retouching, image composition and image authoring. It works on many operating systems, in many languages." The version of GIMP that we suggest using is GIMP Portable, which can be run directly from a thumb drive.
We'll go through this tutorial using Microsoft Windows XP. Click on a link below to skip ahead, or keep scrolling down to start from the beginning.
Overview
Starting With GIMP
Downloading
Go to the Downloads page and select the correct version of GIMP Portable.
Once you reach the sourceforge website, click on this:

and then you'll see something that looks like this:
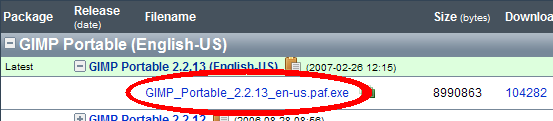
Click on the file and save.
Where to keep the application
In this instance, we decided to download the file directly the the desktop. Make sure to put it somewhere you can easily find it!

If you have a portable USB drive, you might want to use that instead, so you can carry GIMP and the associated files with you to work, school, etc.
Running for the first time
We will run GIMP directly from the desktop.
Install GIMP by double-clicking the downloaded file
There should now be a new folder called GIMPPortable
open that folder and double-click the GIMPPortable application inside
now's a good time to get a cup of coffee
Getting to Know GIMP 
Where am I?
By now you should be looking at two windows. The tops should look like the ones below:

The window labeled "The GIMP" is the main window. From is you can do many things such as open or create a file, view and use a set of editing tools, import images, access extension commands, and get help or tips. This window also has a set of tools for image editing and a dialog for editing those tools.
The window labeled "Layers, Channels, Paths, Undo | Brushes, Patterns, Gradients" is... exactly that! The top half of the window has four tabs (Layers, Channels, Paths, Undo) and the bottom half has three tabs ( Brushes, Patterns, Gradients). If you change the contents of the window, the label of the window will change too.
Setting Up Your Workspace
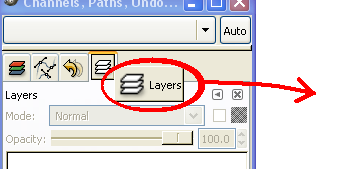
Before you start editing your image, it's a good idea to set up your workspace. The first thing we want to do is to make a seperate window for the layers tab. This is important because easy access to layers will make our job a lot easier later on. You can do this by click-holding on the layers tab and then dragging it out of the window, like below:
Another way to make a new layers window is by selecting File>Dialogs>Layers in the main window.
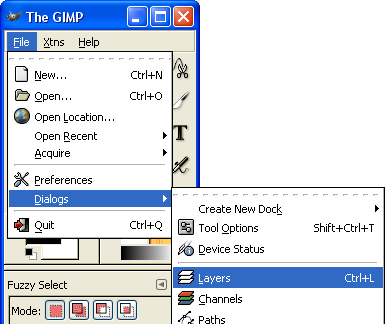
Selecting
There are 7 selection tools that we can use to cut and paste.
 shortcut:R - allows you to select a rectangular region by dragging diagonally across the screen
 shortcut:E - allows you to select elliptical regions by dragging diagonally across the screen
 shortcut:F - create a selection by drawing it free-hand while holding down the mouse, when you let go, it will close the region by drawing a straight line from the point where you let go to the point where you first clicked down
 shortcut:Z - select a contiguous area of similar color using just one click
 shortcut:Shift+O - select all areas of similar color using one click
 shortcut:I - instead of tracing an object's outline by freehand, you can click various points along a boundary and this will make a line that sticks like a magnet to the shape of the boundary, creating a selection of the same shape
 shortcut:B - this last tool isn't really a selection tool, but can be used as one. using the Path Tool, you can create paths that can be used to draw lines, select shapes, or can even be saved to be used later for other uses. You can create a line from placing nodes, and then go back and edit the nodes to make a smooth, curved path.
Layers
If you look at the Layers window, you can see what looks like a left-pointing triangle:
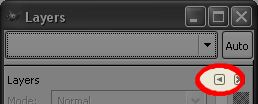
If you click on it, the following menu will pop up, which has another menu inside called the Layers Menu. This can be useful, especially for things such as deleting a layer, or merging two or more layers together.

Saving
As soon as you open an image, save it!
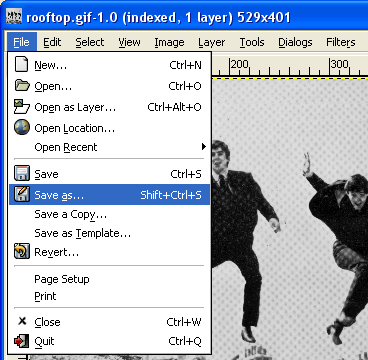
as you can see, our opened image here is rooftop.gif
we're going to save it as a gimp file
if you click on the two plus signs, they will expand to give you more options
"Browse for other folders" will let you choose where to save
"Select File Type" will allow you to choose what kind of file you wish to save as.
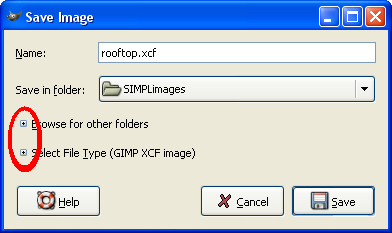
There are many options, but we will save as a GIMP XCF image until we're ready to upload the finished image to the web.

Preparing Your Image
Importing
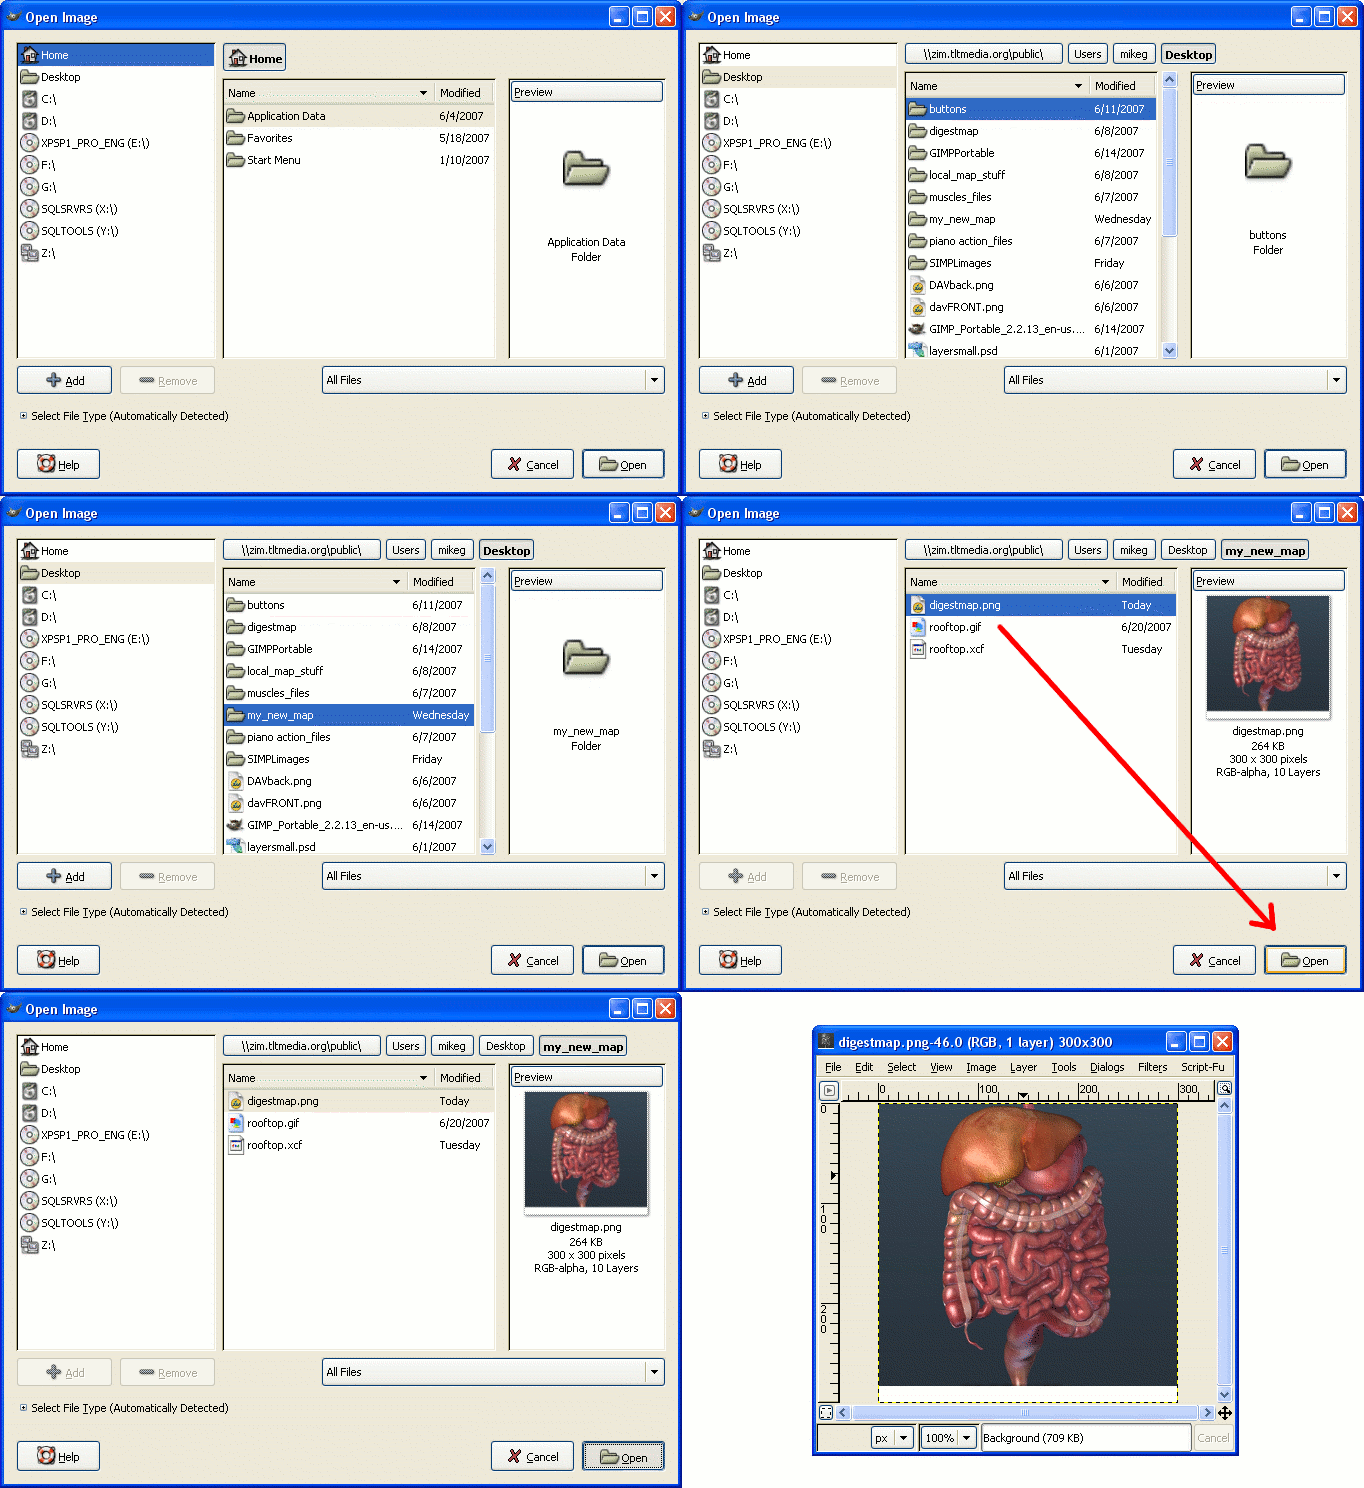
As soon as you have GIMP up and running, you can import your image and start working on it.In the animation below you can see all the steps involved in opening an image. The file that will be made into an image map, "digestmap.png", is located on the desktop in a folder named "my_new_map".
Sizing/Effects
Generally, it's a good idea to hold off on the effects until all the cutting/pasting/layering work is complete, but if you need to resize the image, it's usually easiest to do this first. In this case, we want to trim a little white strip off the bottom. First, press the "R" key, or click on the square-select tool. You'll notice that when you mouse over the image there's now a little dashed square that follows it everywhere. To trim the bottom, drag from outside the image. The black line in the animation below indicates where the mouse click-dragged and the moving dashed line shows what wound up being selected.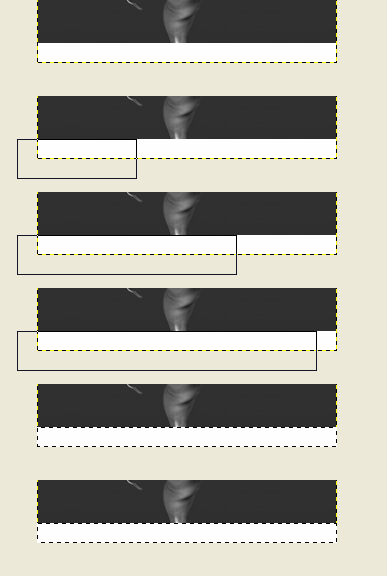
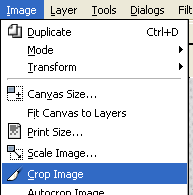
In this case, the selected area is to be discarded. We will use the crop tool because that automatically resizes the image. Since we are using the crop tool, the selection needs to be inverted to include only what we want to keep. (another way to do this would have been to first select what we want to keep, but it isn't always a viable option)
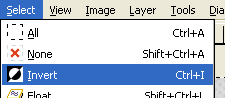
Now that the selection is inverted, the image is ready to be cropped
Layer 0
Layer 0 is different from the other layers for several reasons. It is the layer from which the other layers are derived. It serves as the background of the image map. Last but not least, the layer name becomes the name of the image map. To change the layer name, go to the Layers dialog and double click on the layer you wish to change (in this case, the background layer is the only layer there).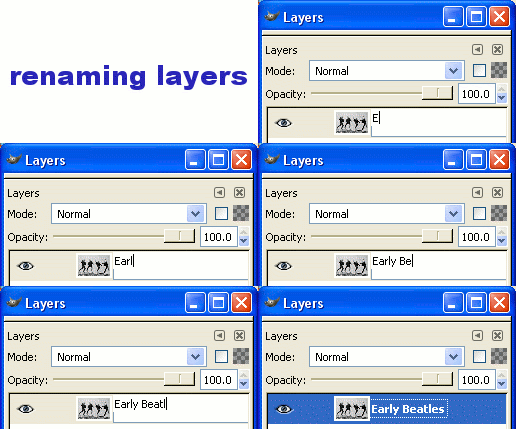
Tracing
Now that the image map is named and the image itself is the size we want it, we'll start tracing layer one. You may find it easier to trace the image if it's magnified. Underneath the image there's a menu for this.
Press the "B" key or click on the path tool. You'll notice that when you mouse over the image, there's an icon that looks like a fountain pen that follows the mouse and a little status icon which starts in the shape of a box. Go ahead and make a bunch of points to define an outline for your shape. If you have a curve or unusual shape, it may help to make extra points. When you get back to the first point, mouse over it and you'll see indicator change from a set of crosshairs to a set of crossarrows. Click on the first point and all the points will turn from hollow circles to black circles. Lastly, press the "Enter" key and a moving dashed line will show the new path you have just created. If you haven't been saving, now's a good time.
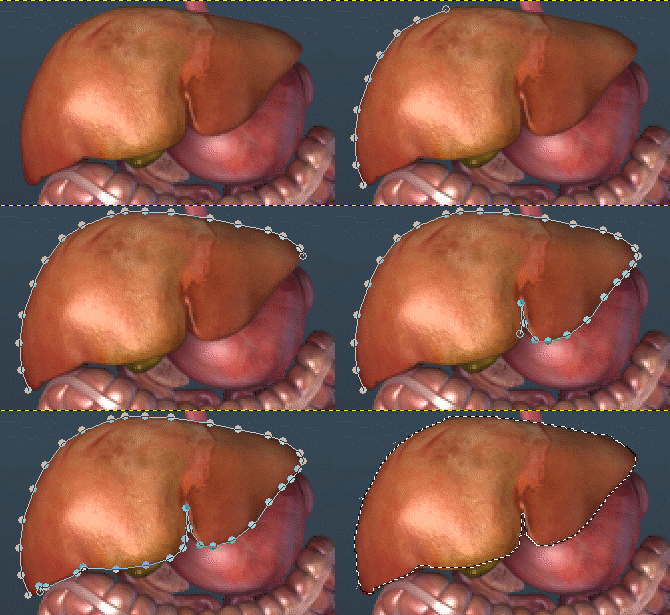
New Layer
After making the path, press "Ctrl-C". Press "Ctrl-P" to paste the shape and a new layer will appear in the Layers dialog. Change the layer name.Merging
Sometimes you will want non-contiguous areas to exist as part of the same layer. To do this, copy and paste all of the areas using "Ctrl-C" and "Ctrl-P", remembering to rename a new layer each time. Next, arrange the layers one on top of the other. Finally, select the topmost layer of those you wish to combine and merge it with the one under it using the Layers Menu>Merge Down tool.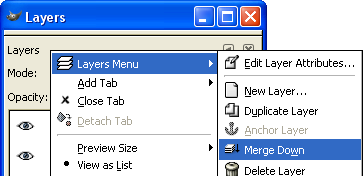
Finishing
Once all of the layers have been created, you must change either Layer 0 or all of the other layers so that there is a clear difference between what will be the moused-over area and the background of the image map. We will discuss two of the many possible ways to do this.Using the fill tool
From the layers dialog, select the layer you wish to work on, and then shift-click on the eye icon so that only that layer is visible. Press the "Z" key and click on the area surrounding the shape(s) contained within the layer. Everything should be selected except for the shape(s) which were previously pasted into the layer from the original picture. Invert the selection.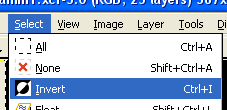
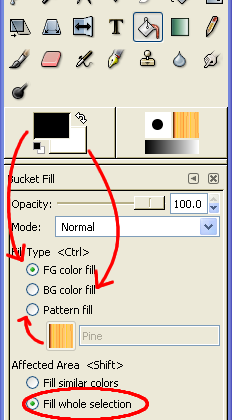
Press "Shift-B" or select the fill tool. In the image below, you can see where the Fill Type can be selected and where to change the options for each fill type. Also, it's very important to select "Fill whole selection" for the Affected Area. If you do not do this, the areas you selected will not be completely filled.
Using Filters
Choose the background layer (Layer 0) and "Shift-click" the eye so it's the only one visible layer. Once you are sure that you are working on the background layer, select the "Filters" tab above the image and navigate to Colors>Colorify.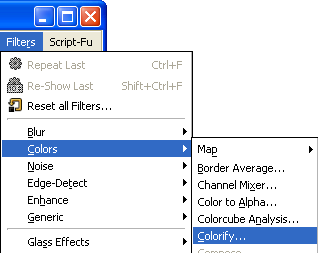
A new dialog will pop up, showing the a preview of the image with the applied filter. The default setting is for grayscale, which is what we want, so all we have to do is press ok.
Exporting
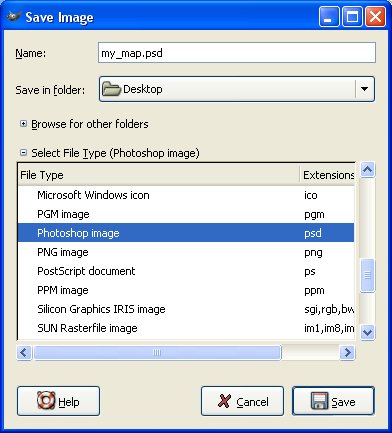
We will export the image as a .psd file, but before we do that, we want to be sure of a few things:- Layer 0 is named for the title of the image map
- make sure that Layer 0 is the only visible layer
- each pasted layer is named appropriately
- there is a clear contrast between the pasted layers and the original image Go to File>Save as
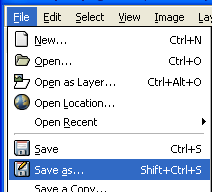
select "Photoshop image" under "Select File Type"
upload your image using the SIMPLE Uploader